Thursday 30 June 2016

Floral Phrases - 50th Birthday Double Display card

So one of my dearest friends is turning 50 this week and I of course wanted to make her something special.

Now this friend is also a fellow Stampin' Up! demo so when I said I had to make something special I mean REALLY special. Something we've not seen or made before, and gosh that was a task and a half.

I decided to turn to my good friend google and looked through, what felt like a thousand fancy fold images, until I found one that was stunning and looked very tricky, which of course meant it would be perfect. The card is called a Double Display Card and I found the tutorial over at the The Craft Spa. Amanda's Double Display cards are absolutely beautiful and I knew it was perfect for my card.

And here is my Double Display Card:

The card really came out absolutely stunning and I am so thankful for Amanda's super easy instructions. It also stands beautifully and it really is just gorgeous.

Now my darling friend loves blue and you would swear that the Floral Boutique suite was made just for her. So it was a no brainer that this would be what I would be using. I of course had to add a big shiny 50th to the front and I love the sentiment from the Number of Year's so that went on the inside.

 The hardest part of this card was choosing which pieces of the beautiful Floral Boutique paper to use.


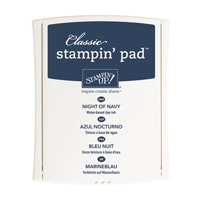
I used the flower from the Floral Phrases stamp set as my background for all my sentiments. I stamped it off three times in total before stamping it on my cardstock. That way it allowed me to use Night of Navy ink for everything, as I really didn't want to add another colour.

So after such a stunning card I then had to come up with a beautiful gift to match it!!

Now a little while ago I had made myself a pretty frame using a Stampin' Up! vinyl that I've had for a while and added some flowers made from the Pop of Pink DSP and the Botanical Builders Framelits. You can see that one HERE. Well my friend saw this and loved it. It also just so happened that I had one more vinyl logo left:

 Wow this was super hard to photograph!! So, I brought a 12x12 frame from my local Big W and transferred the vinyl to the front of the glass. That's the only part of this frame which is permanent.

I think I used each design from the Floral Boutique DSP to make the flowers, with a little added Silver Glimmer for a bit of pop. I slipped one full sheet of DSP into the back of the frame.

Because the flowers are attached to the glass with glue dots, they can easily be removed and swapped out for different papers. The same goes for the larger piece in the back. The whole frame is a bit like living art!!

Needless to say, I gave this to my gorgeous friend and she loved it!! She was so touched with all the work that had gone in to it, which of course I knew she would. Only a fellow crafter would understand and recognize the work and effort.

Happy Crafting,
Chlo

Product List 
 
Number Of Years Photopolymer Bundle
[140811]
$85.75
Night Of Navy 12" X 12" Card Stock
[124282]
$9.95

Sunday 26 June 2016

Can You Case It #126 Sketch Challenge - Swirly Scribbles

 Wow, where did that weekend go?? I honestly can't believe it's Sunday already and gosh hasn't it been chilly. It's the sort of weather that makes you want to stay home, in your pajamas and get crafting... well it does for me anyway.

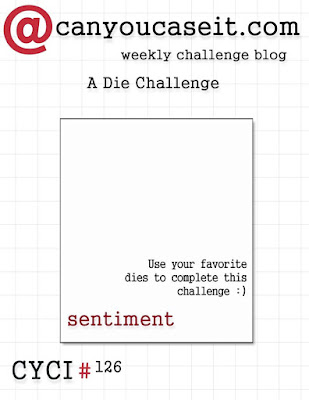
And today is the perfect day to share the card I created for the Can You Case It team. This week we have a fantastic sketch where we had to use a die or framelit.

http://canyoucaseit.com/?p=3244
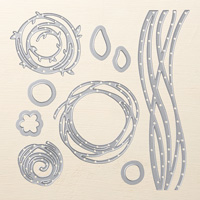
With all the fantastic new dies in our annual catalogue, I was completely spoiled for choice. But it had been a while since I used the new Swirly Scribbles so thought it was time to dust it off:

It's a pretty simple one this week, but I really wanted the words to be the star of the show as such. But doesn't that die just look stunning in gold glimmer.

I used black embossing powder to make my heart pop and then added a little bit of a Pool Party watercolour wash in the background.
You really must pop over to the blog and check out all the other DT's cards. There really is something for everyone on there now, with such a huge team.

And remember that if you want to buy any of the products that I have used today, just head over to my store and check them out. oh and don't forget to use my hostess code at the check out, to get yourself a little Thank You gift!

Happy Crafting,
Chlo


Product List 
 
Black Stampin' Emboss Powder
[109133]
$8.75

Closet Card Class by Mail


I have been asked lots of times, whether I send out class kits. The answer has always been no, but after a while I thought to myself, well why not give it a go.  So today I am bring to you my new Closet Card Class by Mail.

What is a Card Class by Mail?
 
A Card Class by Mail is very similar to the Card Classes that I run each month at my home, except that you will receive your card kits in the post. The kits come pre-cut and with instructions explaining what will be included and if there is anything else you may need.

For example your kits will have:


1) all cardstock, patterned paper and specialty paper pre-cut to size.
2) all items punched and or die cut (Unless they need to me stamped first)

3) all ribbons, trims, buttons, rhinestones and any other embellishment will be included.
4) a full sheet of instructions - Step by step with photos, will be emailed to you.

The kits will NOT contain Stamp Sets, stamped images, framelits or ink pads. You do not need to use the specific stamp set I have used or the ink colours. These can be substituted with what you already have. However if you did want to buy the stamps/framelits used to make these cards, I will happily place an order for you. Oh and if you do order them at the same time as booking in for a Class By Mail kit, I'm offering the kit at half price... Yep 50% off the cost of the kits when purchasing the coordinating stamps/Framelits.

 What supplies will you need? Scissors, Double-side tape, Glue Dots, Bone Folder, White Embossing Powder, Heat gun, Versamark Ink and a Bigshot or Die Cutting machine. The stamp sets and ink colours can be substituted.
How much does Class by Mail cost? There are two options for Class by Mail:

Class by Mail kit only: $25 including postage - packaged as a large letter.

Class by Mail kit plus the Best Bird Bundle: Purchase the Best Birds Bundle (Stamp set and matching Framelits) and receive your kit for half price. Please remember to use the Hostess Code:ZQN4C4S2 when placing your online order. And remember all orders in increments of $50 before postage, will also be entitled to ticks on your Closet Crafters Loyalty Card.


July's Class by Mail kit - Best Birds

Which stamp set will this class be using: Our first Card Class by Mail will be using the Best Bird Stamps and matching Framlits, found in the Annual catalogue. We will also be using the following colours: Blushing Bride, Sweet Sugarplum, Rose Red, Basic Black, Soft Sky, Crumb Cake and Early Espresso.


Important Dates to Remember:
All payments and orders for Class by Mail need to be received between: 25th June - 9th July.
Kits will be sent out by: middle to end of July.


To register just click HERE!!

Happy Crafting,
Chlo

Friday 24 June 2016

TGIF #61 Pick a Favourite Challenge - Sweet Cupcake

Hooray for the last Friday in June, which also means it's time for me to pick a favorite over at TGIF to CASE.

I have to admit this is my favorite challenge and it's really left open for anything to be done or used. Over the last few months I have picked my favorite player and my favorite designer and this month I decided I would pick my favorite challenge which was the colour challange that we had a few weeks ago:
Now these colours really aren't a combo I generally use, but that's where the Challenge comes in!! My Mother-in-law is having a birthday in a few days and I need a card for her. I also wanted to try out my new Sweet Cupcake stamp set and thought these funky colours would be a great match. It would also be a very cheery card to send to the MIL:


I have to admit that I wasn't super keen on it at first, but once I turned the colour volume down a bit and paired it with some kraft cardstock, I really loved how it turned out. The piece of Hardwood stamped cardstock was left over from the Jar of Love card that I made the other day and it just seemed to work with this little cupcake.

The framelits from this set is huge, with so many little extra pieces. The gold glimmer "wishes" sentiment was a die from the set. It also has the word "sweet" too, which can be paired with heaps of the sentiments that are found in the stamp set.

I really think this little set is going to get lots of use over the next year and as it's just so versatile.

Well now it's your turn. Head over to the TGIF blog, take a look back at some of the challenges, the players who entered and even the design team cards and get CASing!!

Happy Crafting,
Chlo

Product List